Friday 28 March 2014

The top 10 social apps for BlackBerry 10


BlackBerry 10 comes loaded with a ton of social tools out of the box, including Twitter, Facebook, Foursquare, LinkedIn, and BBM apps, but for those particularly active social butterflies, there are a whole bunch of apps in BlackBerry World just for you. From blogging to instant messaging to simply seeing what folks are up to, there's an app available on BlackBerry 10. We've picked out the best ways to stay connected with everyone you need to on BlackBerry 10. 
click the link below to find out
http://crackberry.com/top-10-social-apps-blackberry-10

How to get Android apps on BlackBerry from the Amazon Appstore

Amazon offers lots of great free and paid Android apps which can run on your BlackBerry Z10, Q10, Q5 or Z30 - here's how to get started!

Amazon Appstore on BlackBerry 10
The Amazon Appstore promises to be a premiere source for Android apps on BlackBerry, and odds are you want it now that it's so easy to install Android apps. In addition to hosting a lot of content that isn't available in BlackBerry World, Amazon has the added bonus of offering a free app every day. If you want to get started, just follow the three easy steps below. 


Step 1: Download and install the Amazon Appstore

Go to the Amazon Appstore download page in your BlackBerry browser (http://www.amazon.com/getappstore). Tap the "Download the Amazon Appstore" button. The Downloads window should pop up asking you where you want to save it and what the filename should be; just tap Save in the top-right, then tap the file when it's done downloading. If the download window isn't there, tap the overflow menu button in the bottom-right (three little dots), and tap Downloads.
The Appstore should start installing after a short "Processing" indicator. Tap the Install button in the top right, and tap Accept on the pop-up window which informs you of the device permissions that are required for the app to run. 
Amazon Appstore installation for BlackBerry


Step 2: Run and log in to the Amazon Appstore

Find the Amazon Appstore icon on one of your home screens and tap it, or simply tap the magnifying glass icon from the home screen at the bottom in the middle and type "Appstore" in the search box at the top. Tap the Appstore icon in the search results.
Enter your Amazon e-mail and password, and tap the "Sign in with my Amazon account" button. If you don't have an Amazon account, tap the "Create account" button and follow the steps. 

Step 3: Download and install Android apps

From the Appstore home screen, you can swipe up and down to view featured and recommended apps, tap the magnifying glass in the top-right to search for something specific, or tap the menu button in the top left (three dots) to browse categories.
When you tap on an app you want, tap the button in the top right of the entry listing the price of the app. If it's a paid app, you'll need to tap the button again to confirm the purchase before the download begins. 

That's it! 

Enjoy everything the Amazon Appstore has to offer, but keep in mind that BlackBerry isn't officially support. Many apps will work fine, but some others won't. Proceed with caution and let us know about your experience with the Amazon Appstore on BlackBerry in the comments!

How to use Snap on BlackBerry 10.2.1 to install Android APK files


Now that BlackBerry 10.2.1 has arrived for most folks, the ability to install Android APK files with no need for file conversion is going to be one of the biggest highlights. It opens the doors to a lot of apps that otherwise might not be available thanks to the included Android runtime on BlackBerry 10. With that though comes the problem of where to get APK files. 
There's really a lot of way to go about it but to make things a bit easier on folks, the native BlackBerry 10 application Snap was created. Snap is essentially a front end for the Google Play Store so you know APK files downloaded from there are safe and secure as they can be. The apps have passed Google Play's approval process and through the use of Snap, it's no different really than downloading from the Google Play Store directly.
The only problem with Snap is that it is a bit of an advanced method in the fact that the app itself, being a native BlackBerry 10 app, needs to be sideloaded. The great thing about it though is that once it's set up there's no real need to set up anything else because as long as Snap is maintained by the developer, there is very little work you as a end-user of the app need to do in order to keep on installing APK files onto your BlackBerry 10.2.1 device.
If you're looking to sideload Snap in order to gain the ability to download Android APK files directly onto your BlackBerry smartphone, we've put together a guide for you that not only shows you how to sideload the Snap app itself but also how to install APK files directly onto your BlackBerry 10 smartphone using the app. 

Sideloading Snap

  • Download and install Google Chrome.
  • Once Google Chrome is installed, open it up and install this extension for Google Chrome on your computer.
  • Download the latest Snap .BAR file to your computer, place it somewhere you'll remember.
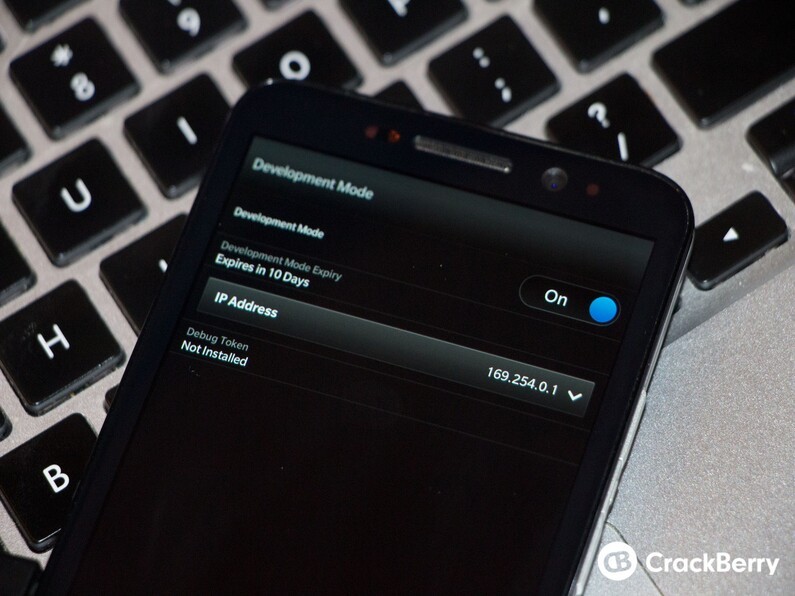
  • Enable development mode on your BlackBerry - Go to Settings>Security and Privacy>Development Mode. Turn the switch to the ON position. Note the IP address it lists as well, it's most commonly set to 169.254.0.1 but if different, make note of it. Also, it may ask you to create a password. If so, make one and do not forget it.
  • Grab your micro-USB cable and plug it into your device, then plug your device into your computer.
  • Open Google Chrome and visit https://169.254.0.1/. If your IP found in development was different, replace 169.254.0.1 with the IP found there.
  • If you get an SSL error page or it says this sites security certificate is not trusted, that's fine. It's not causing any harm. Just accept and proceed. If you get a different sort of error though, like this page cannot be found or this webpage is not available, try reconnecting your device or try a different USB port.
  • Also, you may need to go to the Google Chrome extension settings and enter the correct IP address there. Generally, it auto detects it but if not you'll need to add it manually. Additionally, if you're still unable to connect, make sure your anti-virus is disabled or the app is allowed to run. This often times causes a lot of connection issues especially for Windows users.
  • Once you have the page loaded up, enter in your device password that you created to approve access. You will then see a list of what's already installed on your device.
  • From there, you can go to the top right hand corner where it says 'Install Apps' and click on that. That will open a file explorer window for your computer, in which case you want to browse to wherever it is that you downloaded the Snap BAR file and select it.
  • Once selected, the Snap file will begin installing and you can view the progress in Chrome. When done, you will see 'result::success' indicating that all went well and the file sideloaded properly.
  • You can now disconnect your device from your computer and we'll look at setting up Snap.
Note that this process is applicable for any app that you wish to sideload, not just Snap. If there is other BAR files you wish to install, it can be done the exact same way. If this all a bit too complicated for you, you can make life easier and download Sachesi for your respective computer. Once downloaded, plug in your device, run the Sachesi app and go to the "Install" tab. From there, drag the Snap bar into Sachesi and it will load it. I will note though, DO NOT go messing with anything else in the Sachesi app if you're not aware of what it does.

Setting Up Snap

With Snap now properly sideloaded, the rest is really easy. Once you open up the app, it will ask you for your Google login because again, it's basically acting as a front end for the Google Play Store. That of course, implies you must have a Google account of some type, so if you don't have one of those you'll need to sign up for something Google but I'm sure most of you already have that.
In any case, I'm not going to tell you what to do here. If you're not comfortable with handing over such info, you can swipe from the top in the app to view the privacy policy put forth by the developer of Snap. If it meets your standards, you can proceed, if not quit the app and never look back.


I'm going to assume you want to proceed for the rest of this and rather than writing out the steps for downloading and installing apps using Snap, you can go ahead and click play on the video for a bit of a walkthrough on how it's all done and what to expect when installing apps.

How to install an Android app (APK) to a BlackBerry mobile

BlackBerry 10.2.1 introduced the ability to install .APK files, which are the app files used in Android, directly to your phone. This throws the doors open to install a wide variety of Android apps on your BlackBerry 10 device, be it a Z10, Q10, Q5, Z30, or anything else. This used to be possible through a long, convoluted process, but it's much easier now. Basically, if you can't find an app in BlackBerry World, odds are there are other sources for your favorite app. 
 

Step 1: Find your APK


Step 2: Get the APK file on your BlackBerry

You can get an Android APK install file on your BlackBerry by visiting the source in your BlackBerry browser (which is the easiest option), e-mailing yourself the file, or moving the file directly from your computer to your phone by plugging them together with a USB cable. 

Step 3: Install the APK file from your BlackBerry

If you downloaded the APK from your browser, the Downloads window should have already popped up asking you where you want to save it and what the filename should be; just tap the file when it's done. If the download window isn't there, it's easy enough to get back up. Tap the overflow menu button in the bottom-right (three little dots), and tap Downloads.
If the file was moved to your phone in any other way, you can find it easily by tapping the magnifying glass icon from the home screen at the bottom in the middle and typing ".apk" in the search box at the top. Anything you've moved over should show up under the Documents and Files result. Just tap the one you want to install.
Your Android app should start installing after a short "Processing" indicator. Tap the Install button in the top right, and tap Accept on the pop-up window which informs you of the device permissions that are required for the app to run. 

Extra information

The first time you install an .APK, you'll be prompted to turn off a safety setting which otherwise blocks installation of these files. The previous installation screen should return with a handy "Open" button replacing the "Install" button when it's done. At that point, the app will now show up alongside all of your other apps. Just swipe on the home screen from right to left a few times to find the icon and put it in whatever folder or home screen you like. Hold your finger on the icon for a moment to drag it around. Another thing you may want to do is hide the bar at the bottom of the screen. Just swipe down from the top when the app is open, and tap Hide bar.
Now, remember that there are no guarantees that these apps will function as advertised. BlackBerry does not run Android, it can just run Android apps. The Android app player in BlackBerry 10 is good, and should handle most of what you throw at it. Test things out and let us know what's working and what isn't in the comments! Having trouble installing something? You can ask for help in the comments too!
Here’s another way to speed up animations in iOS 7 with Speed Intensifier


Speed Intensifier is a tweak that’s been around for some time, but was just recently updated to play nice with iOS 7 and arm64 devices like the iPhone 5s. The effect, especially when you take into consideration the drastic animation changes present within iOS 7, is nothing short of startling.
If you’re looking to speed up, at least in perception, the speed of your device, then look no further. Speed Intensifier allows you to significantly increase the speed of animations found within iOS 7, and it does so while allowing you to keep iOS 7′s trademarked style. Check out our full video walkthrough inside, which showcases Speed Intensifier in action.
Once you install Speed Intensifier, head over to the stock Settings app and open up the tweak’s preferences. Inside the preferences, you’ll find a section for custom speed. The custom speed section has several settings, ranging from zero all the way up to infinite—the faster speed possible.

The animation speed changes are enacted in real time, so no resprings are required. I find that the x5 speed is a comfortable animation speed to go with, while the infinite setting is mind-boggingly fast. In fact, the infinite speed is probably way too fast for most tastes, and makes it so that the animations within iOS 7, which are useful for gaining context, are virtually nonexistent.

The last setting you’ll find within Speed Intensifier’s preferences, is a toggle for keeping the wiggle mode animation normal, even when you have Speed Intensifier enabled. The wiggle mode is already fast with normal animation settings, so increasing its speed with Speed Intensifier can cause the wiggle animation to just freeze up completely. This toggle eliminates this issue while allowing you to enjoy the animation speed increases in other areas of iOS.
Although I’m a firm believer that tweaks like this don’t really help you to work faster, there’s no denying that, at least from a perception standpoint, that Speed Intensifier speeds up your device. It makes it seem like your iPhone is supercharged and raring to go. It may be all in the mind, but who cares?
Check out Speed Intensifier today on Cydia’s ModMyi repo. It’s a free download, so you really have no excuse not to try it. 

How to add a fake fingerprint sensor to iOS 7


No, that wasn’t a typo. There’s a new jailbreak tweak available on Cydia that allows you to fake the functionality of a fingerprint scanner on your iOS 7 device. Geared towards folks without a Touch ID enabled device like the iPhone 5s, this tweak does its best to fake the security benefits of a fingerprint scanner.
If only it were possible to actually fake the security of the Touch ID sensor. Spoilerit’s not. And as such, this tweak, ironically entitled Bio, falls squarely into the mix with other “joke” jailbreak tweaks used for comedic effect. Have a look at our video walkthrough after the jump to see Bio in action.
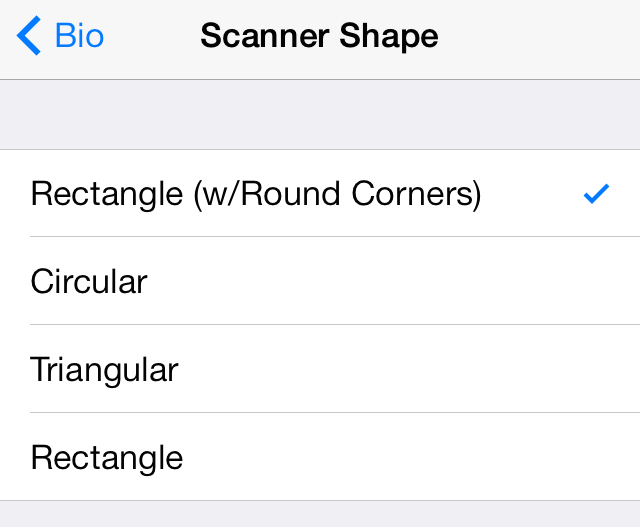
Bio, once installed, places a new preference panel in the stock Settings app with a plethora of different toggles and settings to adjust. Many of the preferences have to do with the look of the tweak, for example, shape, or color of the fingerprint scanner surface

Once you have Bio enabled and configured to your liking, lock your device, and you should see the fingerprint scanning surface appear on your Lock screen. Placing any finger on the scanning surface will cause a line to go back and forth over the surface to emulate a scan. Eventually, your device will be unlocked if you have the passcode disabled, which you’ll need to do to successfully pull off the effect.
If you’re not cool with the lack of true security present when using this tweak without a passcode, there are some secret options that you can enable in the tweak’s preferences to help. For instance, you can enable the mute switch secret option to force users to toggle the mute switch before a device will be successfully unlocked. It’s an insecure workaround, but it helps pull off the effect when demonstrating it to friends.

If you go into Bio with the idea that the effect is a novelty for show, you’ll come out ahead in the end. Just don’t head into purchasing this tweak thinking it will some how miraculously add Touch ID to you device.
Bio is available right now on Cydia’s BigBoss repo for $1.99. Again, this is a steep price for what is nothing more than a novelty, but some of you may deem it a bargain for the novelty aspect, and the reaction that it will garner from unsuspecting friends. What do you think?

How to enable Guest Mode on iPhone


While multiple user account support exists on OS X and certain Android devices, the same cannot be said for iPhone. Enter GuestMode, a new jailbreak tweak by computer science graduate student Ian Burns that offers a fully customizable guest experience like none other.
Allow your kids to play games on your smartphone without accidentally calling someone, or let your friends control your music without lurking through your Facebook or Photos app. Find out how it works… 
GuestMode adds a dedicated menu to the Settings app with a main toggle switch for enabling the tweak, alongside a number of options to configure. There are several methods that can be enabled for entering guest mode from the Lock screen: tapping a guest button added to the passcode keypad, swiping to the left or right on the Lock screen, or assigning an Activator action or gesture. A passcode can also be set specifically for guest mode.

The guest mode experience is highly tailored based on the restrictions that you set. You can choose which apps to enable, and control access to the Camera, Control Center, Notification Center, Siri, Spotlight, Newsstand, phone dialer and app switcher. Apps that are blocked off will appear greyed out on the Home screen, while elements like Control Centerand Notification Center are hidden entirely.
Even though guest mode enhances the privacy of your device, it is not a full-stop solution. For instance, if the Photos app is enabled, a guest could still use the share sheet and gain partial access to Mail, Facebook, Twitter and so forth via that route. All activity carried out on guest mode is not isolated, either, meaning that all game saves or other changes apply to the entire device. But until Apple implements multiple user accounts as a stock feature, this tweak is probably the next best solution.

For the most part, GuestMode performed well on my iPhone. The only minor issue I experienced was the Newsstand icon still remaining greyed out when I unlocked my device outside of guest mode, which is something I resolved with a simple respring. Other users have noted a bug where the Phone app crashes when pressing the voicemail button, although I have not been able to duplicate the problem.
GuestMode is available now on the Cydia Store for 99 cents. iOS 7 or later is required.
Is guest mode for iPhone something you’ve been looking forward to?

How to password protect individual apps with iAppLock


While setting a passcode on your iPhone, iPad or iPod touch can go a long way towards improving the security of your device, it is meaningless in situations where it is already unlocked and an invasive family member decides to read through your Messages history or tamper with your ongoing Candy Crush Saga game.
Fortunately, a myriad of jailbreak tweaks have been released over the years that password protect apps on iOS devices. iAppLock stands as one of the first candidates to be updated with support for iOS 7 or later, and it has some useful features. Read ahead for a complete rundown… 
While most tweaks are configured through a menu in the Settings app, iAppLock is a standalone application with an icon on the Home screen. I’m not a big fan of having jailbreak-related icons in plain sight on my iPhone, so I immediately put it in a folder. The app itself has a simplistic user interface that matches iOS 7 design, and presents you with three different tabs: protect, setting, and more.


The protect tab has a plus sign that you can tap to select native or third-party apps to password protect, although there is a five app limit that will require purchasing the upcoming professional version to override. I chose to password protect Mail, Facebook, Twitter, Google+ and Safari because of their social implications, although you can place a password on whichever apps you desire.


When you or someone else attempts to open a protected app, a password prompt pops up and prevents access until the correct passcode is entered. iAppLock also has a passcode of its own, so that people can’t go into the tweak and disable it. Alphanumeric passcodes are not supported, but hopefully a future update will alleviate that. The developers should also consider adding passcode support for folders.


The settings tab has a number of options to configure, including a delayed lock setting where no passcode is required for a short amount of time after successfully opening one protected app. For instance, if you type in your passcode to open Facebook, all other protected apps will be accessible for the length of delay you select.
The delayed lock lengths offered include 1 minute, 5 minutes, 10 minutes, 20 minutes and 30 minutes. Additionally, there are menu items for changing your passcode or retrieving it through an authenticated email if you ever forget.
Last, the more tab offers the ability to send feedback to the developers — The ThinkYeah Studio — or share the tweak. It also has a defunct link to upgrade to the unreleased pro version of iAppLock, which remains a work in progress. The regular iAppLock is available now on Cydia for free in the BigBoss repository.

HOW TO ENABLE DRUNK MODE ON IPHONE


You are out for a night on the town with your friends, and perhaps you’ve had one too many Long Island Iced Teas or Peppermint Schnapps. We’re not judging you, but others might be when you send them a misspelled text message or perhaps worse. Fortunately, if you have an iPhone, this is an easily avoidable situation.
While it might sound stupid, a jailbreak tweak called Drunk Mode actually serves a relatively useful purpose. The tweak is a very simple one; when enabled, it prevents you from sending iMessages to your friends, family, boss, co-workers or whoever else you probably shouldn’t be talking to at the time. Details ahead… 
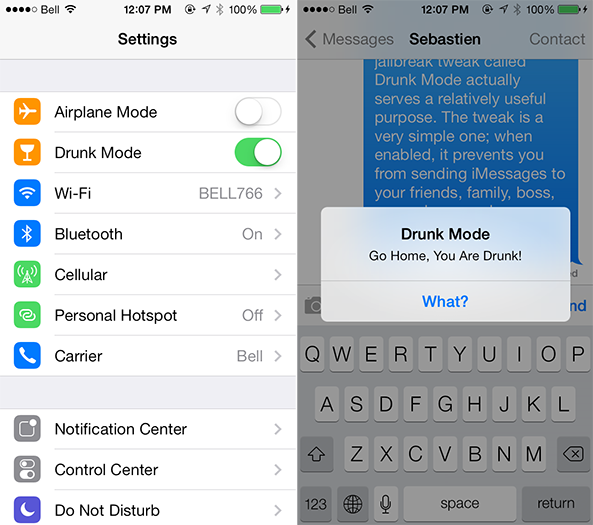
Drunk Mode adds a toggle switch below Airplane Mode in the Settings app that proves easy to access on your Friday night out. When enabled, a notification box will pop up with the message “go home, you are drunk” when you attempt to message someone through the Messages app.
There are a few limitations to this tweak, however, with the main one being that you could simply go back into Settings and toggle off the tweak. The other downside is that it does not prevent you from sending messages with third-party messaging apps like Facebook Messenger, Kik Messenger or WhatsApp.
In all seriousness, though, Drunk Mode should not serve as a valid excuse for drinking excessively without any consequences. This is more of a novelty tweak than anything, and not getting drunk in the first place is probably a better idea. Drunk Mode is free on Cydia in the BigBoss repo.

How to add a rain effect to the iPhone’s Lock screen

Rain Lock is a jailbreak tweak that lets you add custom “rain” effects to the iPhone’s Lock screen. The rain is really just text, which can be custom text or one of the two built-in text effects.
As you may have already figured out, Rain Lock isn’t the type of tweak that adds enhanced functionality to your iPhone, neither does it help you work smarter—it’s a tweak that’s unapologetically centered on visual flair. And that’s okay, because that’s what Rain Lock does well, and it gets it right for the most part. Mosey on inside for a look into how Rain Lock works via our hands-on video walkthrough…
As with most tweaks with customizable aspects, you’ll need to go into the stock Settings app to find Rain Lock’s preferences. The preferences for Rain Lock is its weakest point. There’s just too many settings and not enough cohesiveness. I wish developers focused more on polishing the back-end aspects of their releases, as doing this would make for an easier and more pleasurable experience when it comes to configuration.

Rain Lock defaults to the typical Matrix-inspired text with the green and white abstract letters, but you can customize it with text of your choosing, and even alter the color of the text. The color customization allows you to select a head and tail color, which, as I quickly realized, works best on longer text strings.
Invoking RainLock can be accomplished by using a simple double-tap gesture on the Lock screen or a short press. You can also enable a toggle in the tweak’s preferences to make the rain effects auto start upon locking your device.
Lastly, you’ll find settings for a custom intro message i.e. “wake up Neo,” rain size, rain speed, and rain amount. I think it’s pretty safe to say that with a few minutes of customization, you’ll be able to come up with a look that’s wholly original and unlike anyone else’s Lock screen.
The privilege to use Rain Lock will cost you a bit more than the average tweak, though; it’s priced at $2.50 and it’s available right now on Cydia’s BigBoss repo. The price might be a hard pill to swallow (see what I did there?) due to the fact that the tweak adds no functionality improvements to iOS, but if you’re at all concerned about having an original looking Lock screen, then you’d be hard pressed to come up with something better than this. What do you think?

Microsoft offering free Office 365 subscriptions to iPad owners in retail stores tomorrow


Microsoft finally released Word, Excel and Powerpoint apps for iPad for free earlier today. But, the free apps only allow you to only view documents. You need to get the Office 365 subscription, which costs $6.99/month or $69.99/year if you want to edit or create documents.
If you think that’s too much, there is a way to get Office 365 free for 1 year. Microsoft has just launched a promotion to celebrate the launch of Office on the App Store where it is giving away 1 year free Office 365 subscription to the first 50 people who bring their iPad to a Microsoft store.
The promotion starts on Friday, March 28th and runs through March 30th. So click on this link to find a Microsoft store in your area. The opening hours of most stores is from 11:00am, so you may want to go there a little early to be one of the first 50 people.
office-ipad-promo